Previous

Next
Home > Building Your Application > Adding a Department Column ...
 Previous |
 Next |
In this exercise, you link the Employees and Departments reports. When you complete this section, the Employees report will have a Departments column showing which department each employee belongs to.
To perform this task, you create a column on the Employees page to enable the user to select a department. You then run the Employees report and add the Departments column to the report. The report settings are saved as the default.
Topics:
In order to filter the Employees report by department, add a Department column to the report.
To add a column:
Click on Edit Page 3 in the Developer toolbar.
Under Regions, right-click Employees and select Edit.
The Region Definition appears.
Scroll down to Source.
Replace Region Source with the following SQL:
SELECT e.EMPLOYEE_ID,
    e.FIRST_NAME,
    e.LAST_NAME,
    e.HIRE_DATE,
    e.SALARY,
    e.COMMISSION_PCT,
    calc_remuneration(salary, commission_pct) REMUNERATION,
    e.DEPARTMENT_ID,
    d.DEPARTMENT_NAME
FROM OEHR_EMPLOYEES e,
    OEHR_DEPARTMENTS d
WHERE e.DEPARTMENT_ID=d.DEPARTMENT_ID
Click Apply Changes.
Click Apply Changes to confirm.
The next section explains how to add the column to the report display and how to use this column to filter employee reports.
When you first run this report, use the Select Columns action to add the Department Name column to the display. Once this column is visible on the report, make this report the default and filter by department.
To add the Department Name column to the report:
Click the Run Page 3 icon.
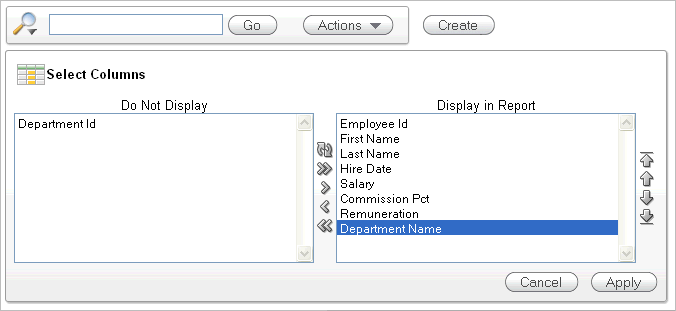
Click the Actions menu and select Select Columns.
Move Department Name from the Do Not Display box to the last entry in the Display in Report box.

Click Apply.
The Employees Report is displayed and includes the Department Name column.

Next, make these report settings the default.
This section describes how to save the current report settings as the Primary Default report. Report settings are any setting made through the Actions menu including: selected columns, filters, sorting, rows per page, format setting such as sort control breaks, highlighting, and so on, and flashback.
Both developers and end users can save interactive reports. However, only a developer can save the report that initially displays, called the Primary Default report.
Once the default settings are saved, these columns are the default display in this report.
To save the current report settings as the default:
Run the Employees report page.
The current report default does not include the Department Name column when the report is displayed.
Click the Actions menu.
Select Save Report.
For Save, select As Default Report Settings from the list.
Accept the Default Report Type setting, Primary, and click Apply.
|
Note: If a reset is performed on this page, these default report settings are used. The Department Name column is displayed by default. |