Previous

Next
Home > Building Your Application > Modifying the Departments R...
 Previous |
 Next |
When you run the Create Application Wizard, the wizard creates forms and reports based on the selections you make. Behind the scenes, Application Express writes a query for you to extract the appropriate data from the database.
In this exercise, you modify the query for the Departments report to include information from the OEHR_EMPLOYEES table. Three columns from the OEHR_EMPLOYEES table, Number of Employees, Manager Name and Location, are added to the Departments report. The Manager Name column replaces the Manager Id column and the Location column replaces the Location Id column.
To modify the Departments report:
Click the Edit Page 2 link on the Developer toolbar (at the bottom of the page).
The Page Definition for Page 2 appears.
A page is the basic building block of an application. Pages contain user interface elements such as tabs, lists, buttons, items, and regions. To see the definition of each page belonging to your application, you use the Page Definition page. For more information, see "What Is Application Builder?".
Under Page Rendering, locate Regions.
Expand Region and locate Departments.
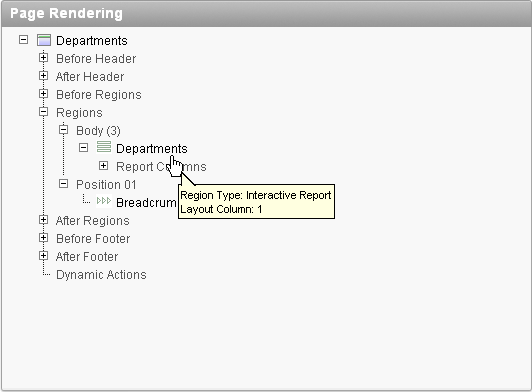
Right-click Departments and select Edit.
|
Tip: You can also double-click Departments. |
The Region Definition appears.
Scroll down to Source, and replace the default Region Source script with the following:
SELECT d.DEPARTMENT_ID,
    d.DEPARTMENT_NAME,
    (select count(*)from oehr_employees where department_id = d.department_id)  "Number of Employees",
    substr(e.first_name,1,1)||'.'||e.last_name "Manager Name",
    c.COUNTRY_NAME "Location"
FROM OEHR_DEPARTMENTS d,
   OEHR_EMPLOYEES e,
   OEHR_LOCATIONS l,
   OEHR_COUNTRIES c
WHERE d.LOCATION_ID=l.LOCATION_ID
    AND l.COUNTRY_ID=c.COUNTRY_ID
    AND d.DEPARTMENT_ID=e.department_id
    AND d.manager_id=e.employee_id
    AND instr(upper(d.department_name),upper(nvl(:P2_REPORT_SEARCH,d.department_name)))>0
Click Apply Changes.
Click Apply Changes to confirm.
Right-click Departments and select Edit Report Attributes.
Click the Edit icon next to Number of Employees.
Under Column Definition, select center for Column Alignment.
Click Apply Changes.
To see how the page looks to end users, run the page. When you run a page, the Application Express engine dynamically renders and processes the page to display viewable HTML.
To run the page:
Click the Run Page icon in the upper right corner.
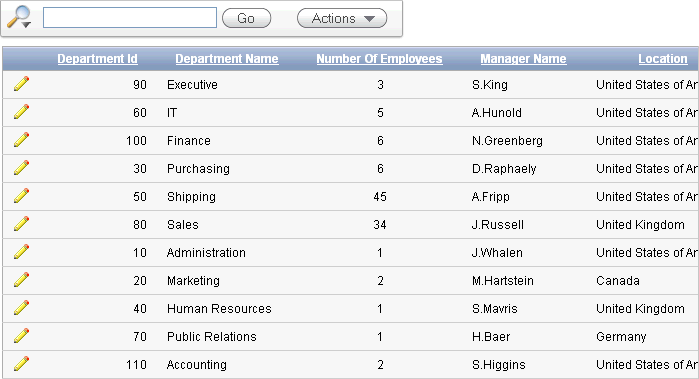
The revised Departments report appears.
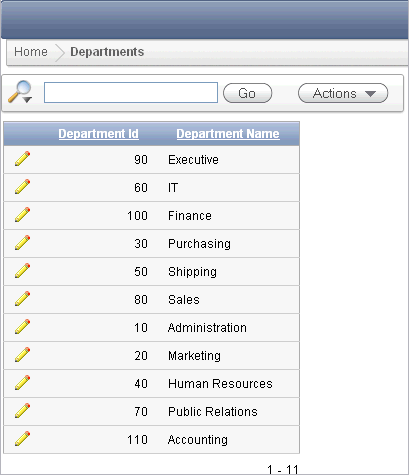
Note that the Manager Id and Location Id columns are not available. Also note that the three new columns do not display on the revised report: Number of Employees, Manager Name, and Location. The following steps are required to add these columns to the display and reorder them.
To add the new columns, click the Actions menu.
The list of Action options appears.
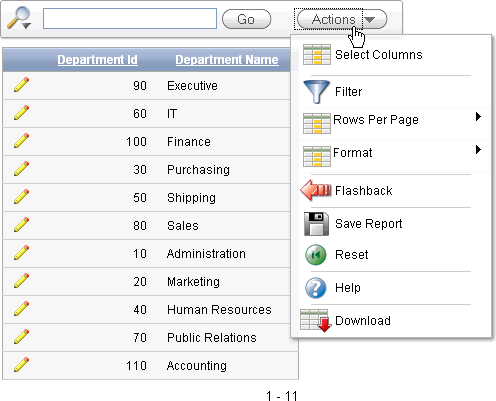
Select Select Columns.
The columns that were added by the new SQL query are in the Do Not Display box.
Click the Move All icon to add these three columns to the Display in Report box. The Move All icon looks like the following figure. 
Description of the illustration bldap_moveall.gif
Verify if the columns are in the following order. If they are not, click up and down arrows to the right of the Display in Report to change the order:
Department ID
Department Name
Number of Employees
Manager Name
Location
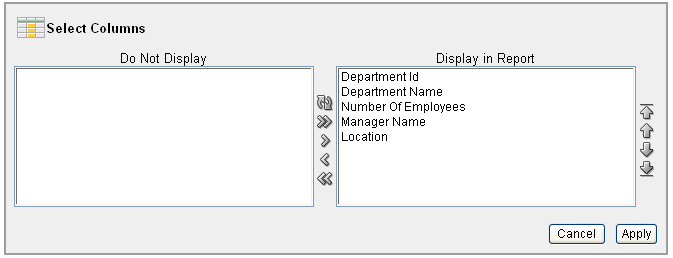
Click Apply.
The Departments page appears and includes the new columns.
