Previous

Next
Home > Migrating a Microsoft Acces... > Step 4: Create a Migration ...
 Previous |
 Next |
To create a migration project:
Log in the workspace you created for your conversion project as described in "Logging in to Your Oracle Application Express Workspace".
Click the Application Builder icon.
Click Migrations on the right side of the page.

On the Application Migrations page, click Create Project.
The Create Migration Project wizard appears. Note that the steps included in the wizard appear in a flowchart on the left of the page.
Enter the project details:
Project Name - Enter a unique name. You might want to use the same name as the Microsoft Access .mdb file you used to create the project.
Type - Select Access.
Description - Enter a meaningful description for this project. You might want to describe the Microsoft Access .mdb file that you used to create the project.
Schema - Select the schema.
The default schema is the schema associated with your workspace. If multiple schemas are associated with your workspace, all associated schemas appear in the select list, arranged in alphabetical order. When this situation exists, select the schema associated with the SQL script you want to upload.
Migration Export File - Click Browse and select the .sql file created by the Exporter tool for Microsoft Access.
Click Next.
Review the project details, and click Finish.
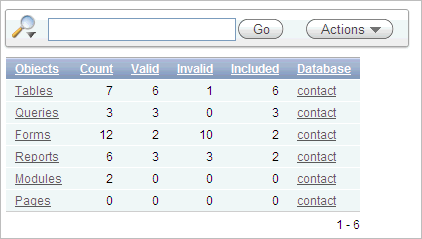
The project page appears.

This page displays as an interactive report. To customize the report, use the Search bar at the top of the page. See "Customizing Interactive Reports" in Oracle Application Express Application Builder User's Guide.