Previous

Next
Home > Converting an Oracle Forms ... > Step 5: Review and Edit For... > About the Application Migra...
 Previous |
 Next |
The Project page shows a high-level overview of your Oracle Forms conversion project.

Topics
To view project details, click the project name. The Project page appears.

With the exception of the File Name column, most of the information on the Project page only applies to FormModule XML files (for example, Blocks, Triggers, and Program Units columns). If a column does not apply to the uploaded file, a 0 displays.
The Project page lists the following information about uploaded files:
Type - Identifies the type uploaded by displaying the appropriate file extension (for example, RPT for Report and FMB for FormModule files).
File Name - Displays the file name and extension (XML or TXT) uploaded into the project.
Blocks - Displays a count of blocks in FormModule XML file. A single block can be mapped to a region in Oracle Application Express. A region is a area on a page that serves as a container for content. Each page can have any number of regions. You control the appearance of a region through a specific region template.
DB Blocks - Displays the database data blocks in the uploaded FormModule XML file. These blocks can be based on any of the following block data source types: table; procedure; transactional trigger; or subquery. Blocks included in the DB Blocks count are not control blocks. Note that the associated Database Block property is set to Yes.
Triggers - Displays a count of all form-level, block-level and item-level triggers associated with the uploaded FormModule XML file.
Record Groups - Displays a count of Record Groups in the uploaded FormModule XML file.
Lists of Values - Displays a count of lists of values (LOVs) in the uploaded FormModule XML file.
Alerts - Displays a count of alerts in the uploaded FormModule XML file.
Program Units - Displays the number of schema objects that enable you to access and manipulate database information.
Component Count - Lists the number of components that have been uploaded to the Conversion project.
Completed Components - Displays a count of components within the conversion process that have been reviewed and have been marked as Complete.
Percent Complete - Lists percent of components which have been marked as Complete.
You can review Forms attributes and track manual conversion by clicking the links on this page.
Many pages in Application Migration Workshop display as interactive reports. You can customize the appearance of these pages using the Search bar at the top of each page.

Use the Search bar to create custom searches and customize and filter the information that appears on the page.
Available controls on the Search bar include:
Search icon - Resembles a magnifying glass. Click this icon to narrow your search to only specific columns. To search all columns, select All Columns.
Text area - Enter case insensitive search criteria (wild card characters are implied) and then click Go.
Go button - Executes a search or applies a filter.
Actions menu - Use this menu to customize an interactive report.
To learn more, see "Customizing Interactive Reports" in Oracle Application Express Application Builder User's Guide.
Three buttons display to the right of the Search Bar:
Click Upload File to add files to your conversion project. See "Uploading Additional Files".
Click Create Application to create an Oracle Application Express application based on the components included in your conversion project. See "Step 6: Generate the Oracle Application Express Application".
Click Run Application to submit the pages within your Oracle Application Express application to the Oracle Application Express and render viewable HTML. Note this button only appears after you generate an application.
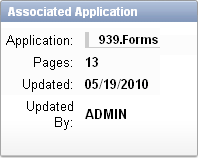
The Associated Application only displays after you create an application. This box displays application name, number of application pages, last update date, and the user who performed the updates. Click the application name to link to the Application home page within Application Builder.

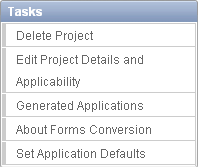
The Tasks list displays on the right side of the page.

The Tasks list contains the following links:
Delete Project deletes the current project.
Edit Project Details and Applicability links to the Project Details page. See "Editing Project Details".
About Forms Conversion links to a page that explains how to convert Oracle Forms applications.
Set Application Defaults links to the Set Application Defaults page. See "Setting Up Application Defaults".
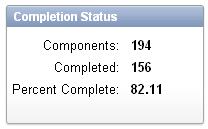
A Completion Status box displays on the right side of the page listing the total number of components, completed components, and percent complete.

To add files to your conversion project:
Go to the Project page:
Log in the workspace you created for your conversion project as described in "Logging in to Your Oracle Application Express Workspace".
Click the Application Builder icon.
Click Migrations on the right side of the page.
Click a project name.
The Project page appears.
On the Project page, click Upload File.
For File Type, select one of the following:
Forms Module - Upload a FormModule in XML format (myForm_fmb.xml). Use the Forms2XML conversion tool to convert Oracle FormModule .FMB files to .XML format.
PL/SQL Library - Upload a PL/SQL Library associated with your Oracle Forms application (myLibrary.PLD). The library must be in text format. Use the File > Convert option in Oracle Forms Builder to convert PL/SQL library .PLLs to .PLD text files.
Oracle Report - Upload an Oracle Report in XML format (myReport.XML). Use the File Conversion option in Oracle Reports Builder to convert binary(.RDF), ASCII (.REX), and .JSP Reports to XML format.
Object Library - Upload an Object Library in XML format (myObjects_olb.XML). Use the Forms2XML conversion tool to convert Object Library .OLB files to .XML format.
Forms Menu - Upload an Oracle Form Menu in XML format (myMenu_mmb.XML). Use the Forms2XML conversion tool to convert FormsMenu .MMB file to .XML format.
File - Click Browse and locate the file your want to upload.
Click Upload.
The Confirm page appears.
To add more files, click Upload and Upload Another and repeat the previous step until all files appear on the Confirm page.
Review the file details, and click Finish.
The Project page appears.